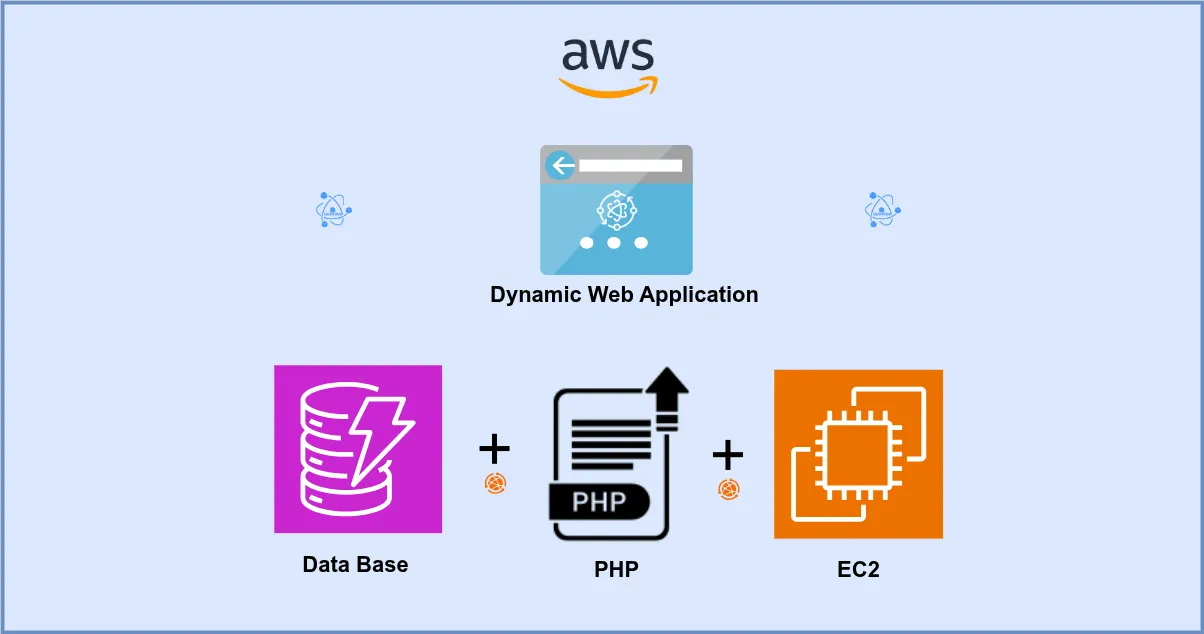
In this guide, I will be hosting a fully functional ecommerce web application on AWS. This includes creating a secure VPC, setting up an EC2 instance, configuring an RDS database, and deploying a LAMP-based web server to host your application. By the end, you’ll have a scalable, cloud-hosted ecommerce solution.
Architecture

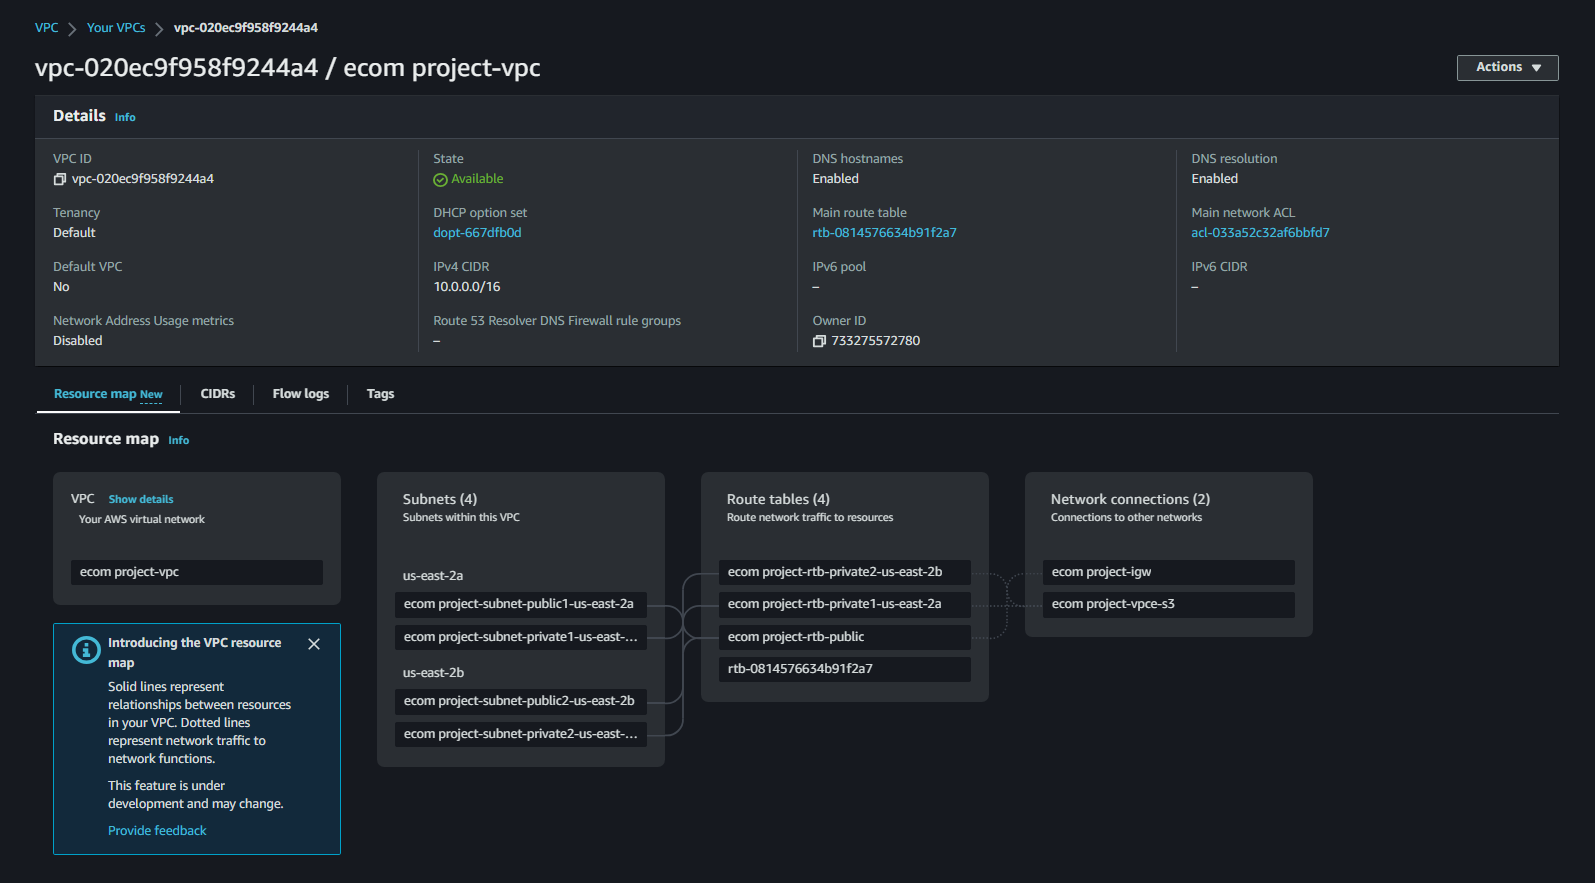
Step 1: Create VPC
Start by creating a VPC to isolate your ecommerce environment with at least two availability zones for high availability.
- Navigate to the VPC console and select “VPC and More.”
- Configure your VPC with a CIDR block and subnets across multiple availability zones.
- Ensure that the necessary internet gateway and route tables are set up to allow connectivity.

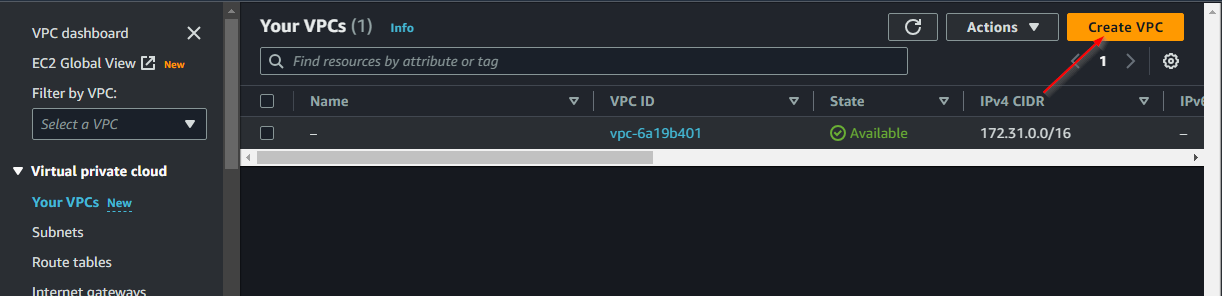
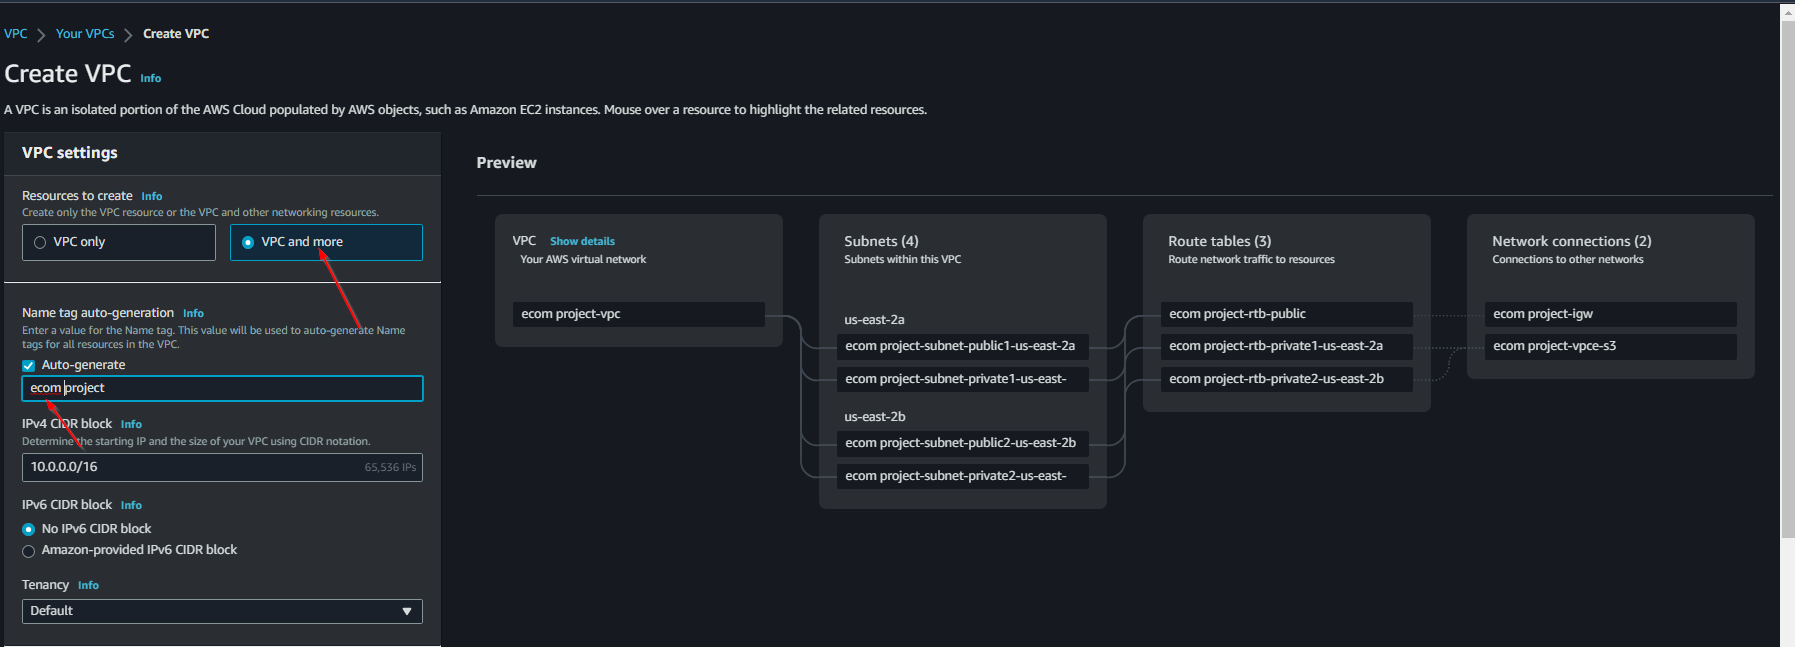
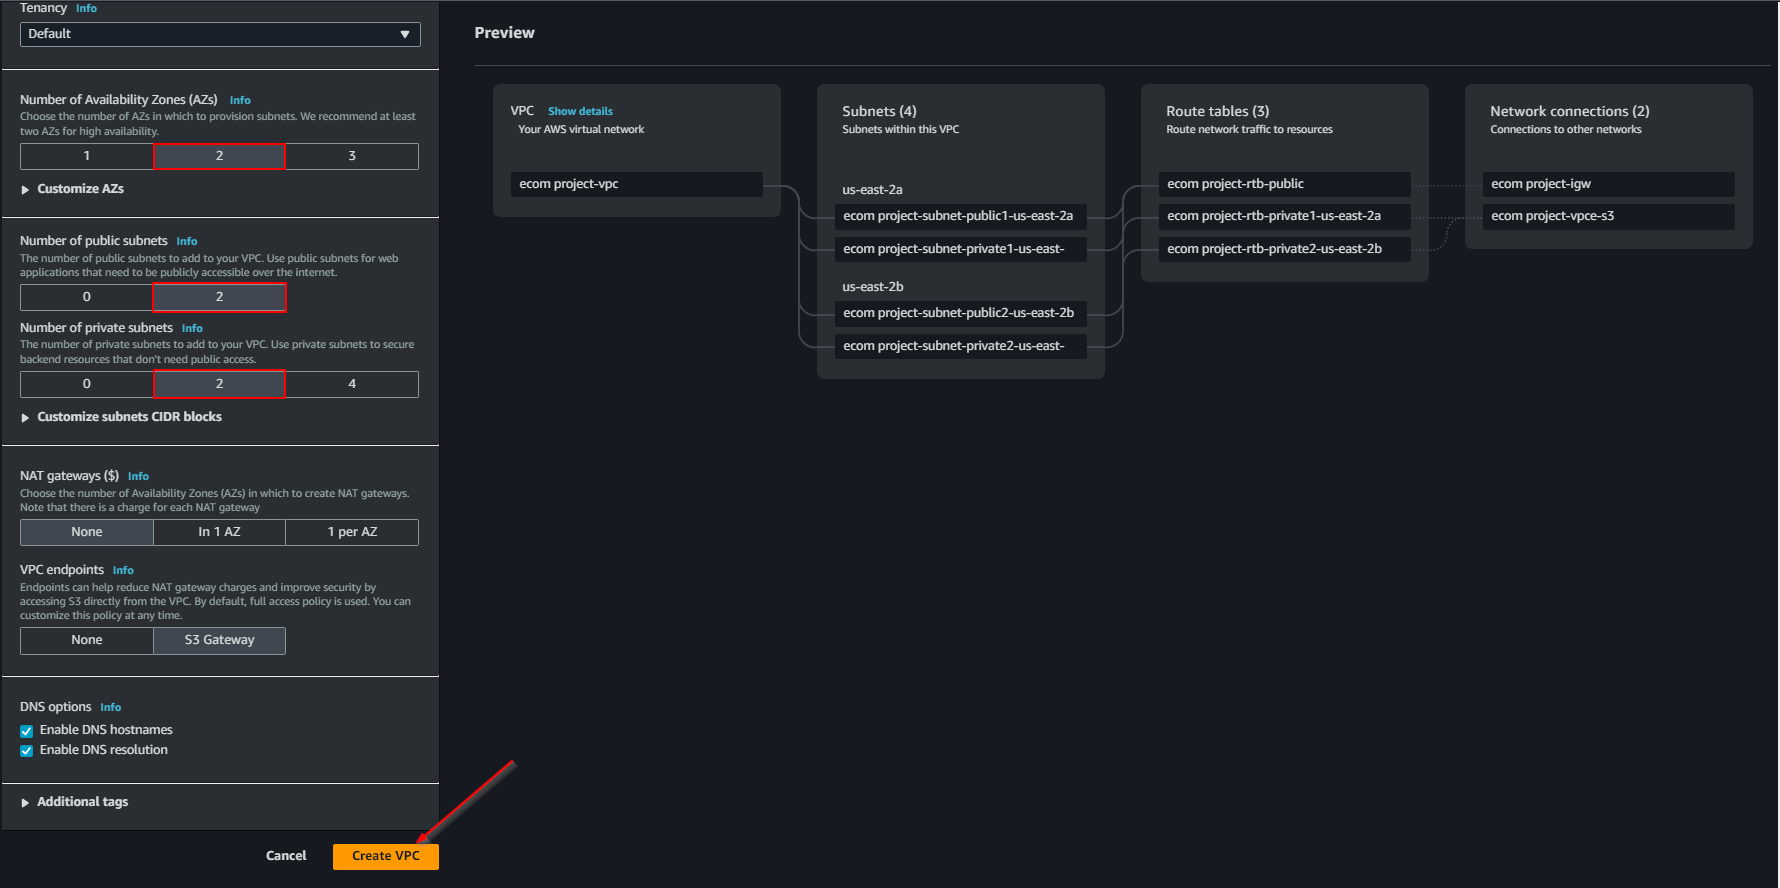
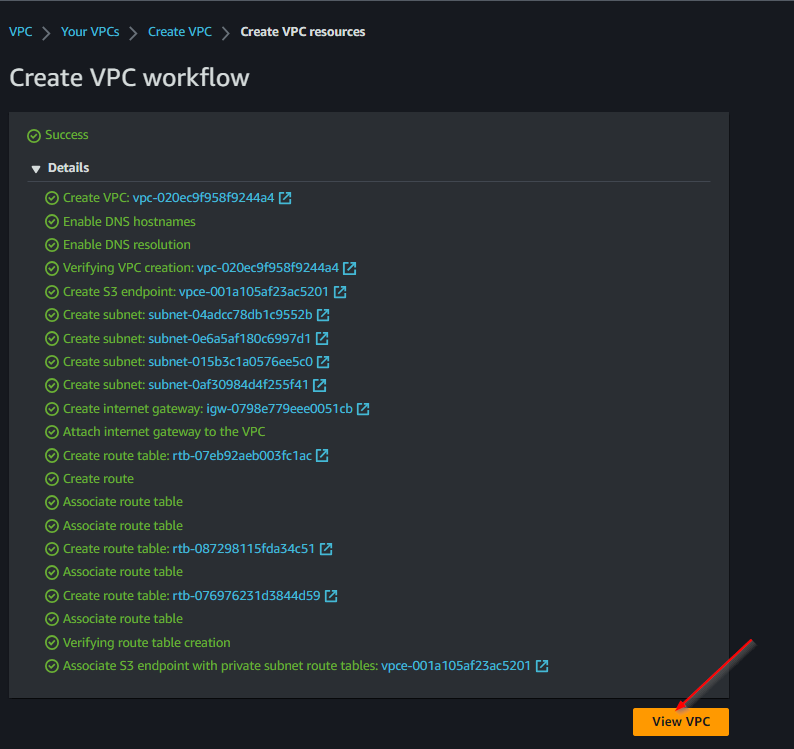
Outcome: Your VPC should look like this:
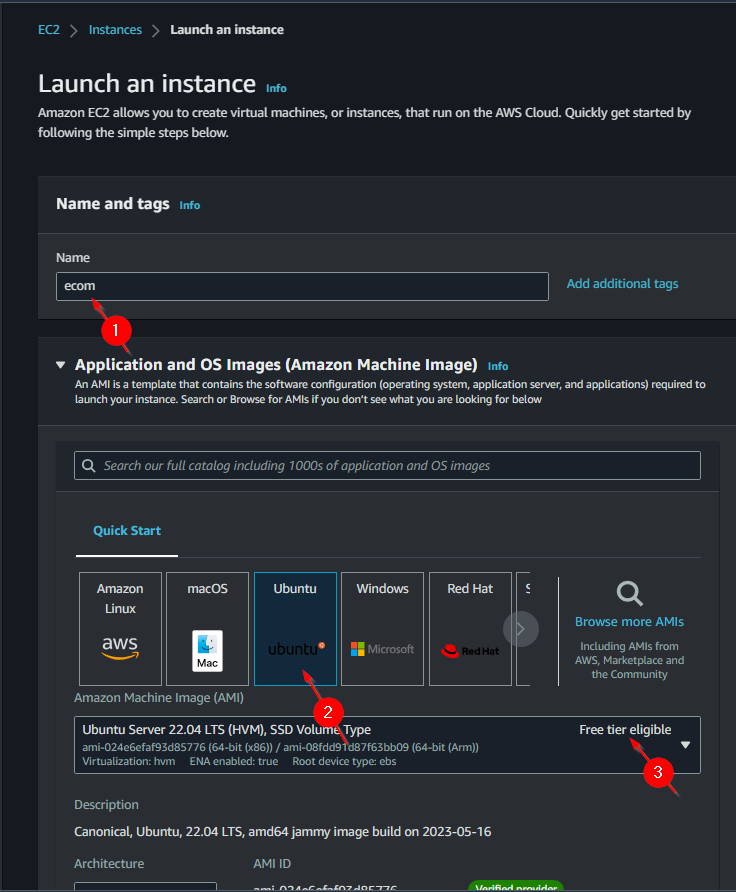
Step 2: Create EC2 Instance
- Launch a new EC2 instance using the Amazon Linux AMI.
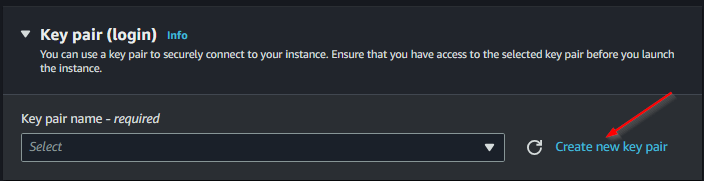
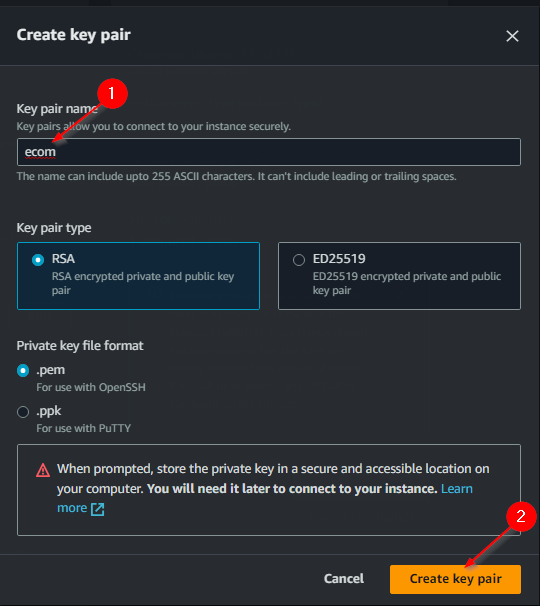
- Create a new key pair for SSH access.

Create key pair
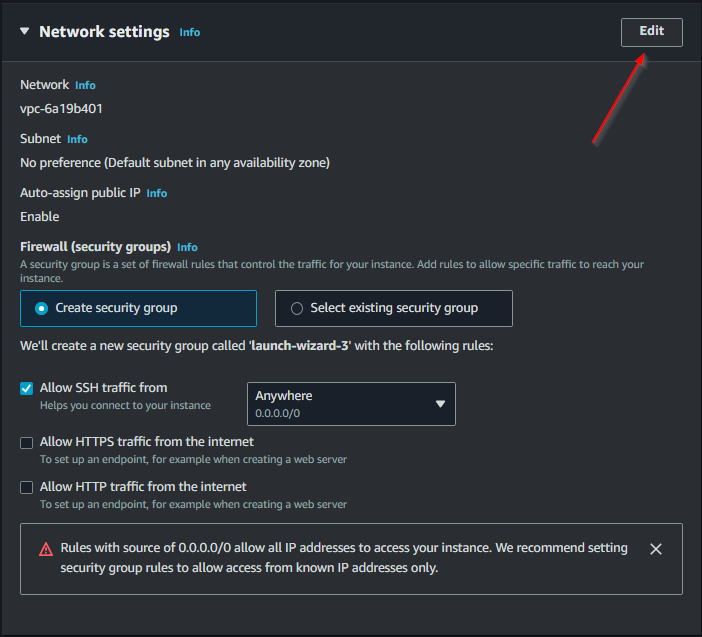
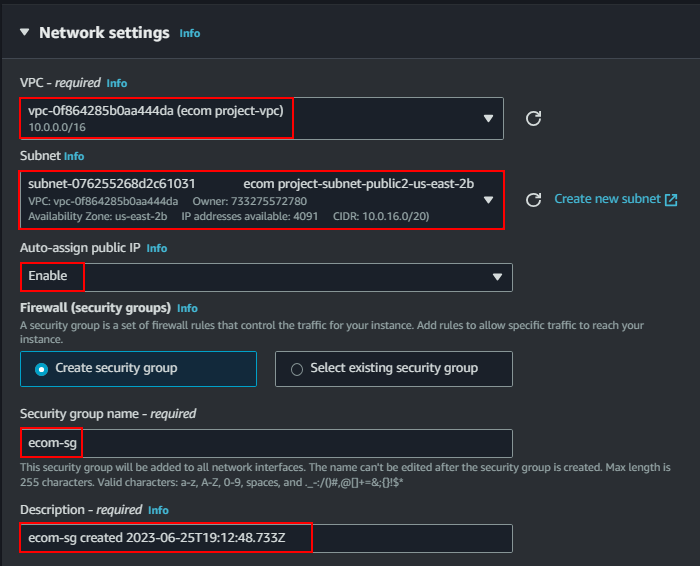
Edit Network Settings
- Edit the network settings to associate the EC2 instance with the VPC created earlier.
- Enable auto-assign public IP and configure security group rules to allow HTTP, HTTPS, and SSH access.
- Select the ecom vpc
- enable auto assign public IP
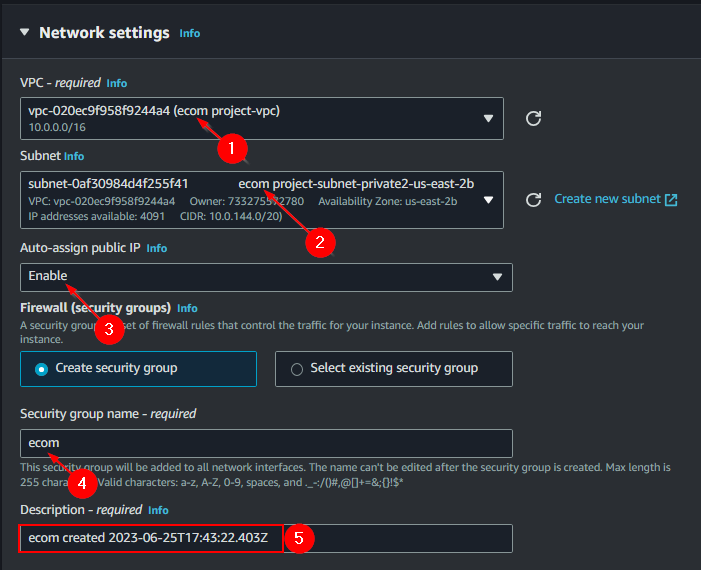
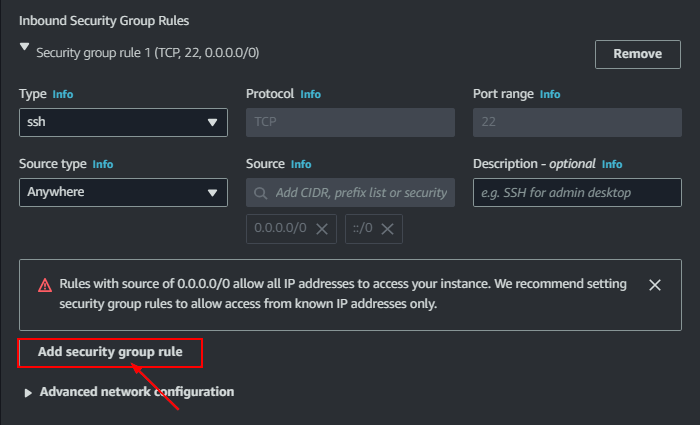
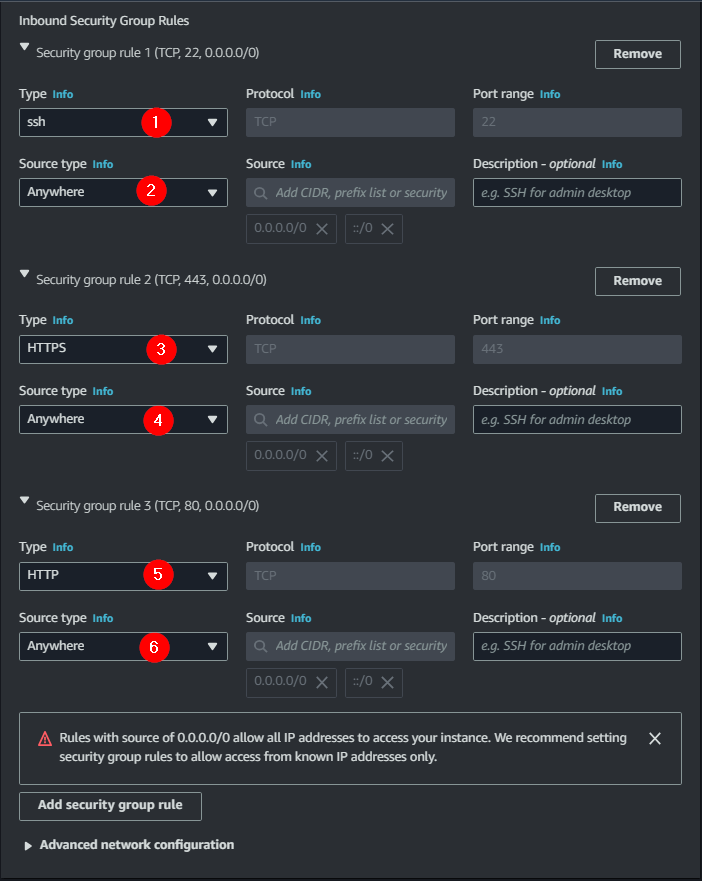
- Still under network add security group rules HTTP & HTTPS
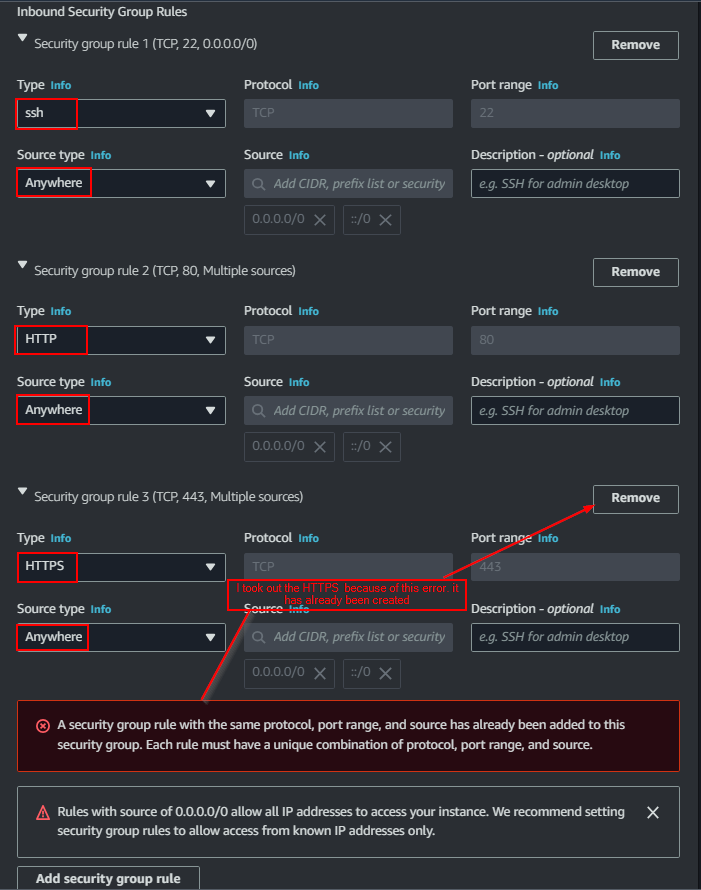
Ensure that the security group has rules for:

- **HTTP**: Port 80
- **HTTPS**: Port 443
- **SSH**: Port 22

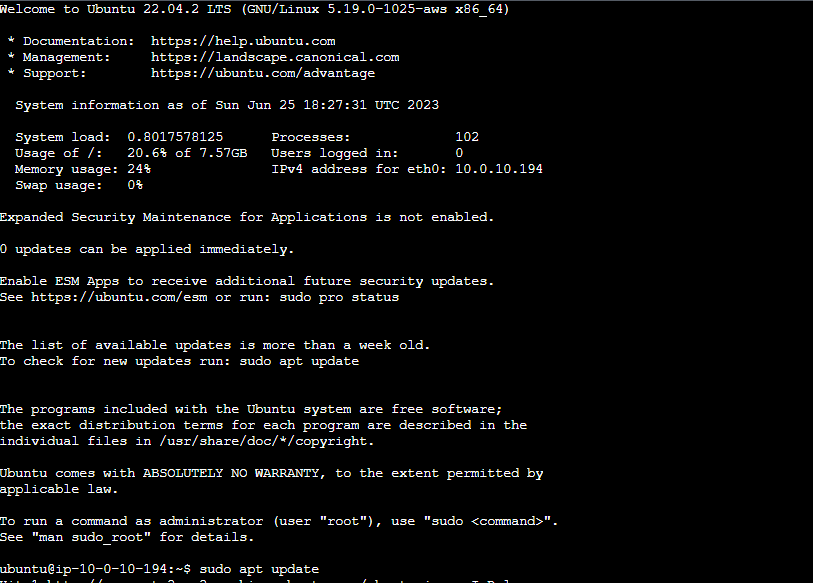
Connect to the EC2 Instance
- Use your key pair to SSH into the instance.
- Update the package cache using:
- Update apt cache
sudo apt update
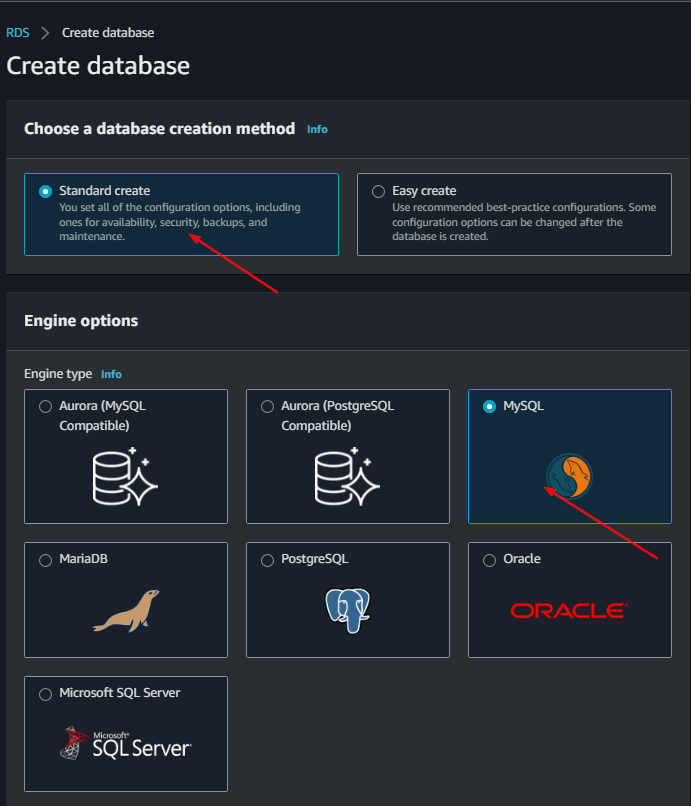
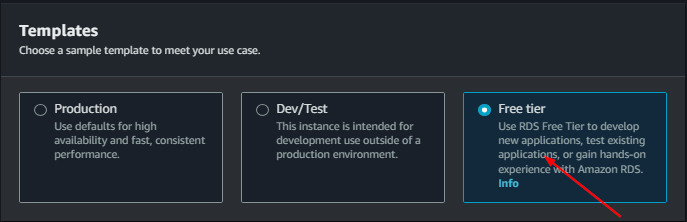
Step 3: Create MySQL RDS
- Launch a MySQL RDS instance.
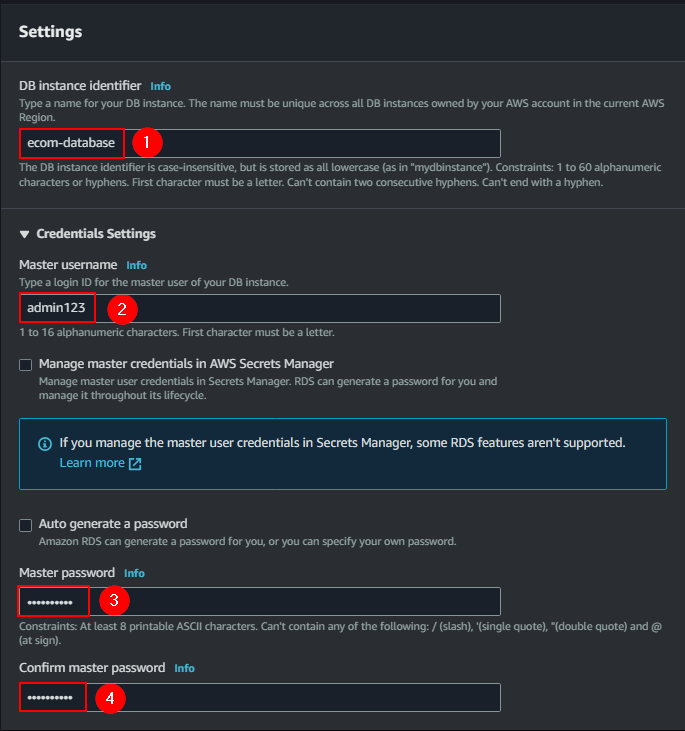
- Configure the database with the following:

	database:

	name: ecom-database
	username: your-db-username
	password: your-db-password
Select the VPC
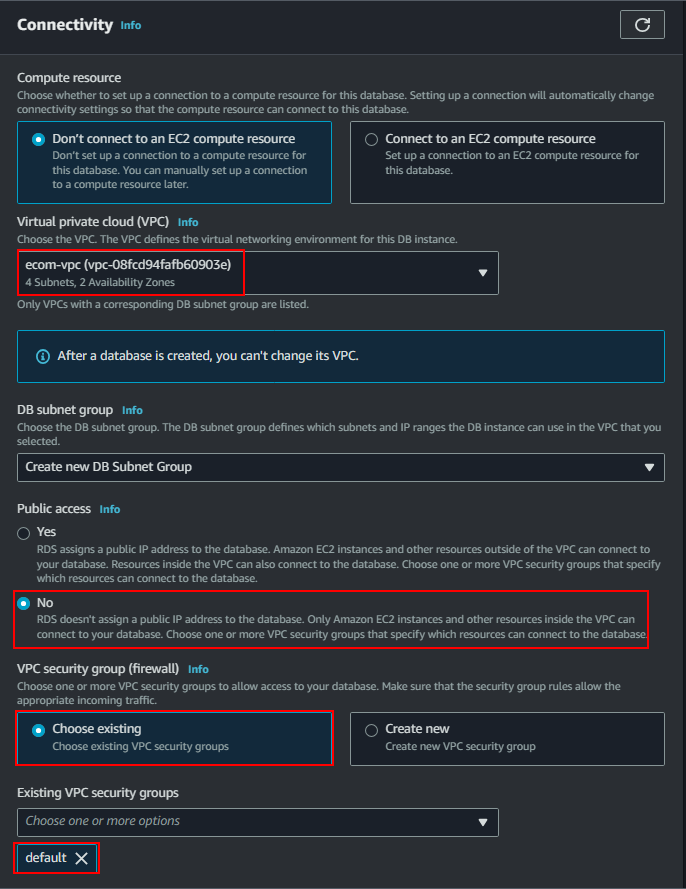
- Associate the RDS instance with the same VPC as the EC2 instance.
- Ensure that the EC2 instance is on a public subnet for RDS connectivity.
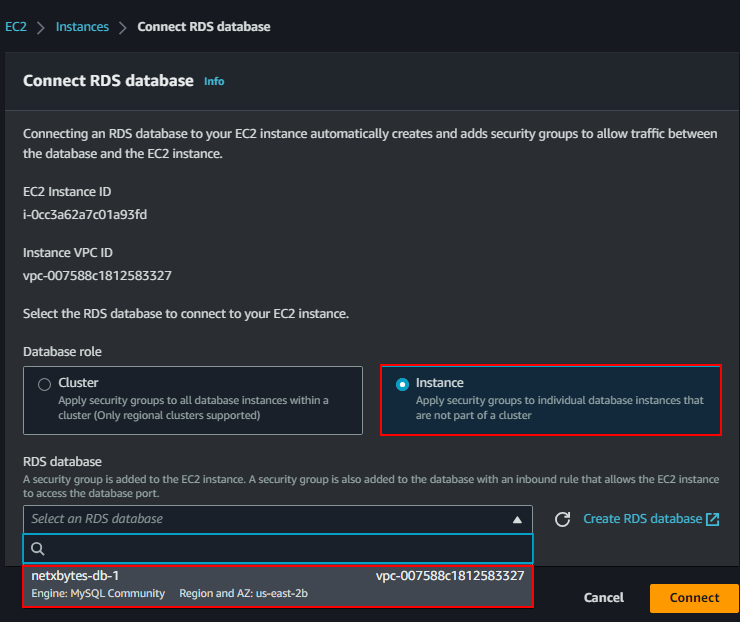
Connect the EC2 instance to RDS:
Use the EC2 instance to connect to the RDS database:
mysql -h your-rds-endpoint.us-east-2.rds.amazonaws.com -u your-db-username -p
If connection fails, ensure the EC2 security group allows inbound MySQL traffic on port 3306.
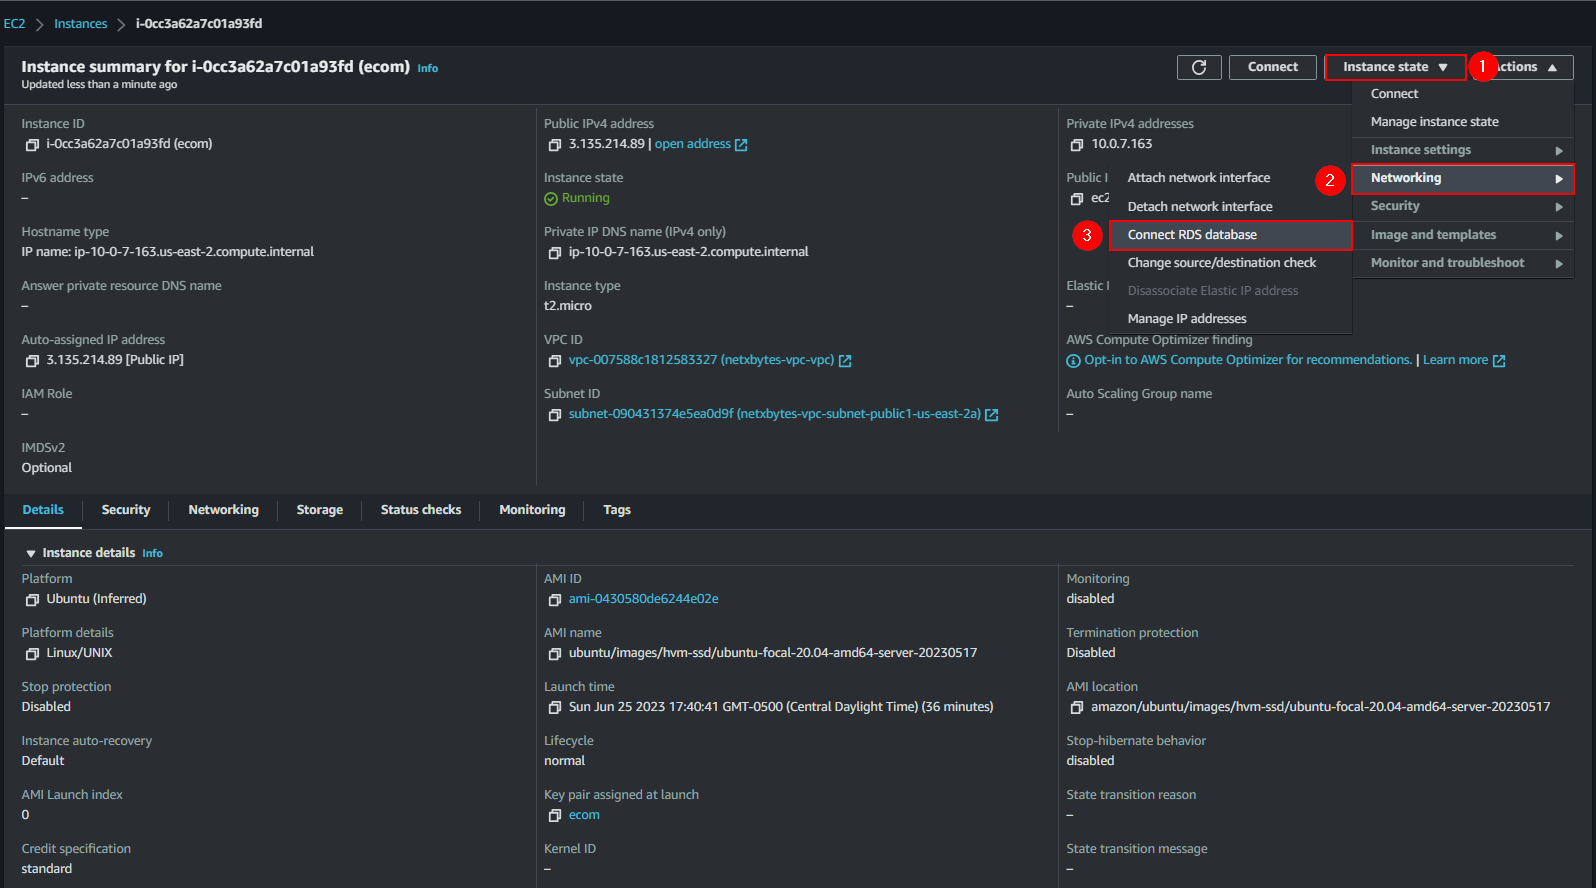
To connect to the RDS subnet this is necessary
- Go to your EC2 instance
- click on Actions > Networking > connect RDS Database
Step 4: Setup EC2 Web Server
Install LAMP Stack:
sudo apt update
sudo apt install lamp-server^

- Install MySQL Client
sudo apt install mysql-client

- Verified that apache is installed
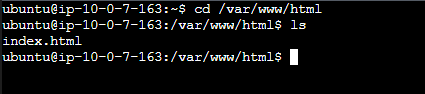
cd /var/www/html
Clone the ecom site from GitHub
sudo git clone https://github.com/Jhoode/Electronix-Website.git

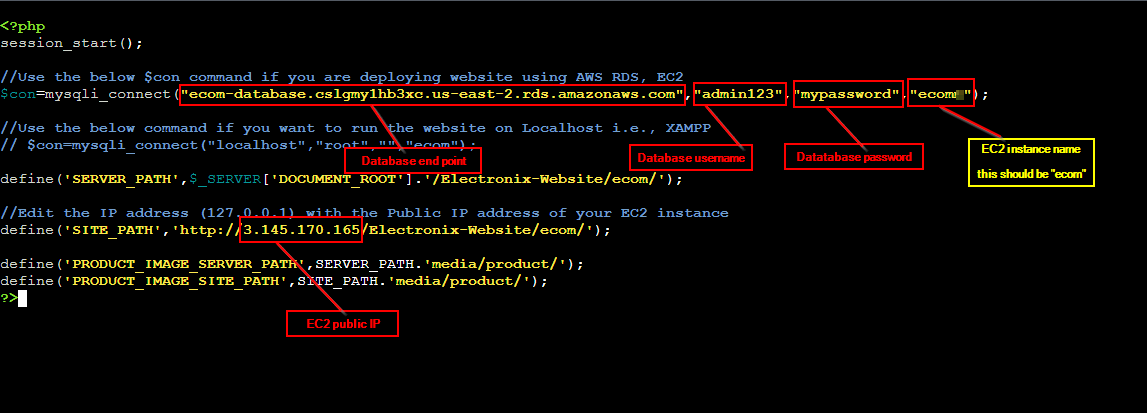
Update the connection file (connection.inc.php) with the RDS endpoint, username, and password.
cd Electronix-Website/ecom/

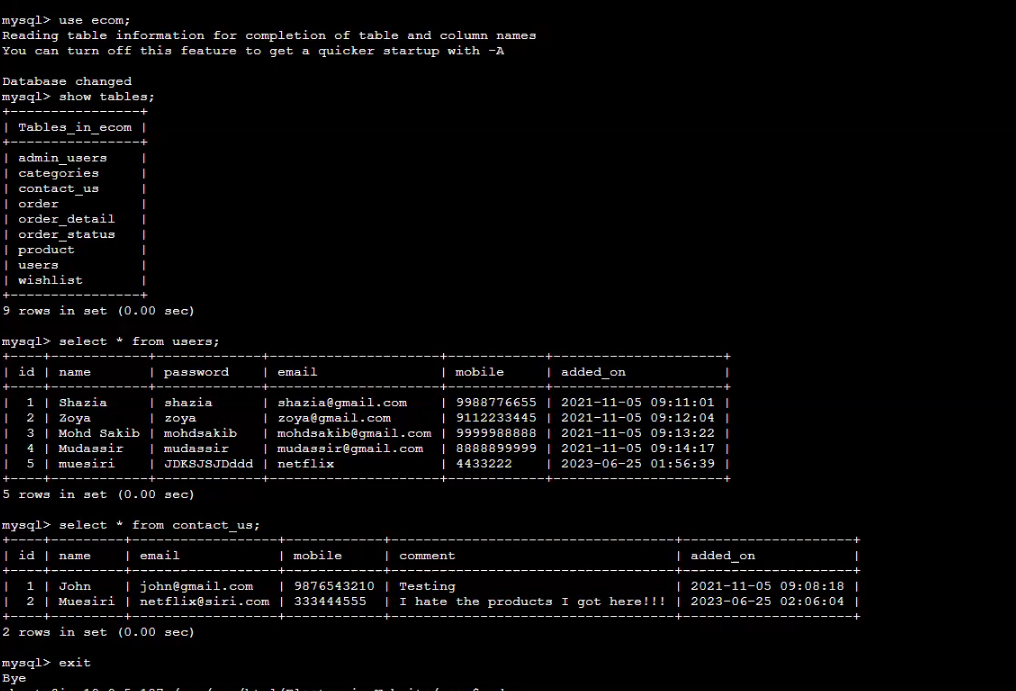
Step 5: Setup Database
Connect to the database
mysql -h your-rds-endpoint.us-east-2.rds.amazonaws.com -u your-db-username -p
Note: if this does not connect you directly to the data base you need to go to the EC2 security group and add the mysql ports 3306 from anywhere.

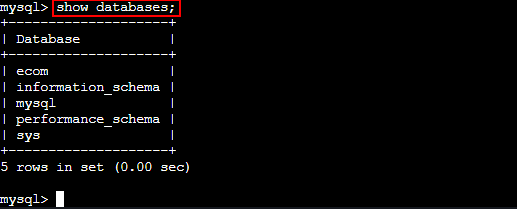
Note: if you don’t see the database (ecom) just create a new
create database ecom;
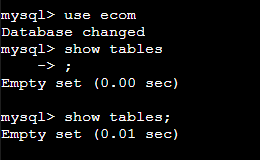
use ecom
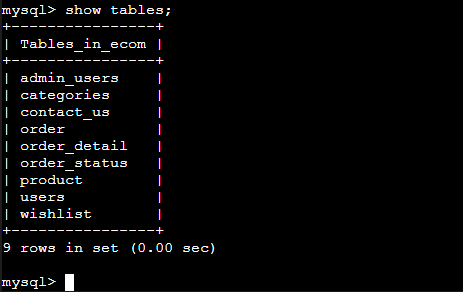
show tables;
Create tables
copy the ecom.sql from the git repo
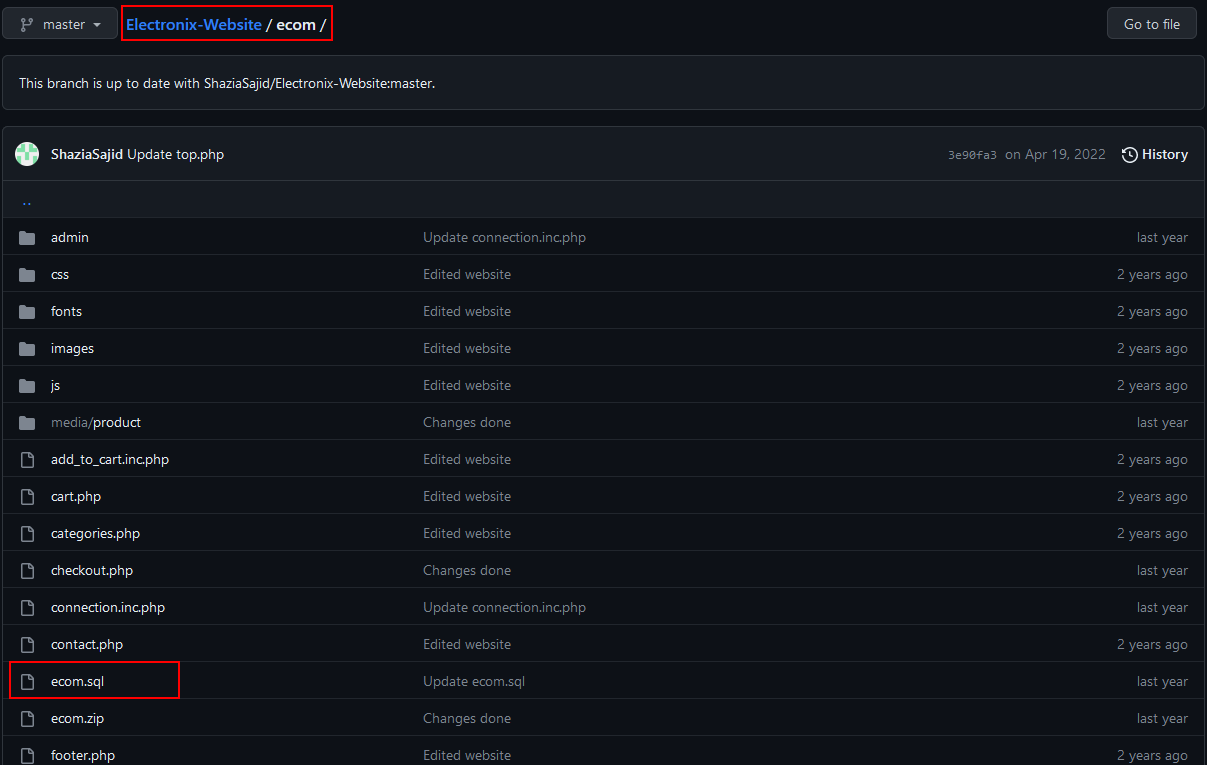
Copy everything from line 30 to 353
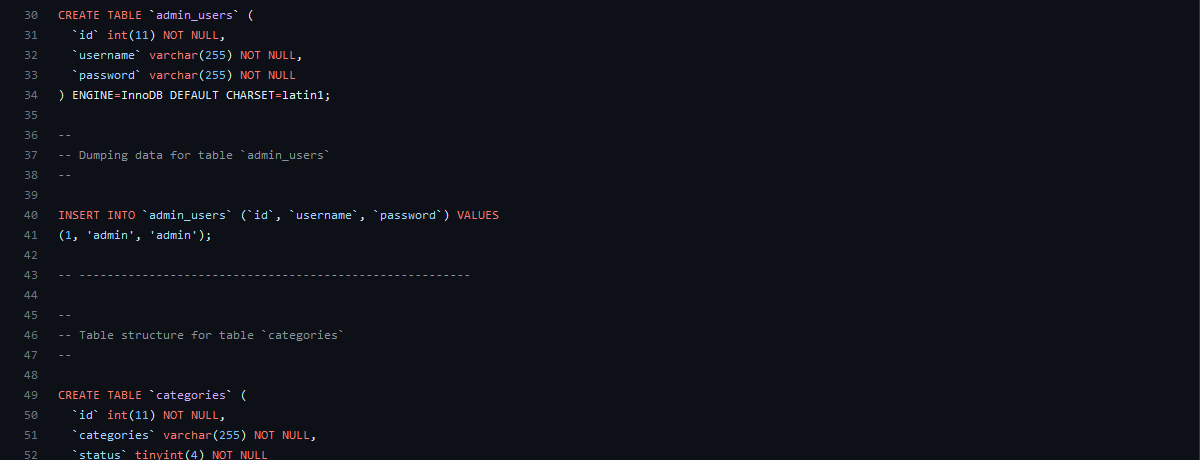
Paste in the ecom database

show tables;
Exit the database

Update the following
- Database endpoint
- Database username
- Database password
- EC2 instance name
- EC2 public IP
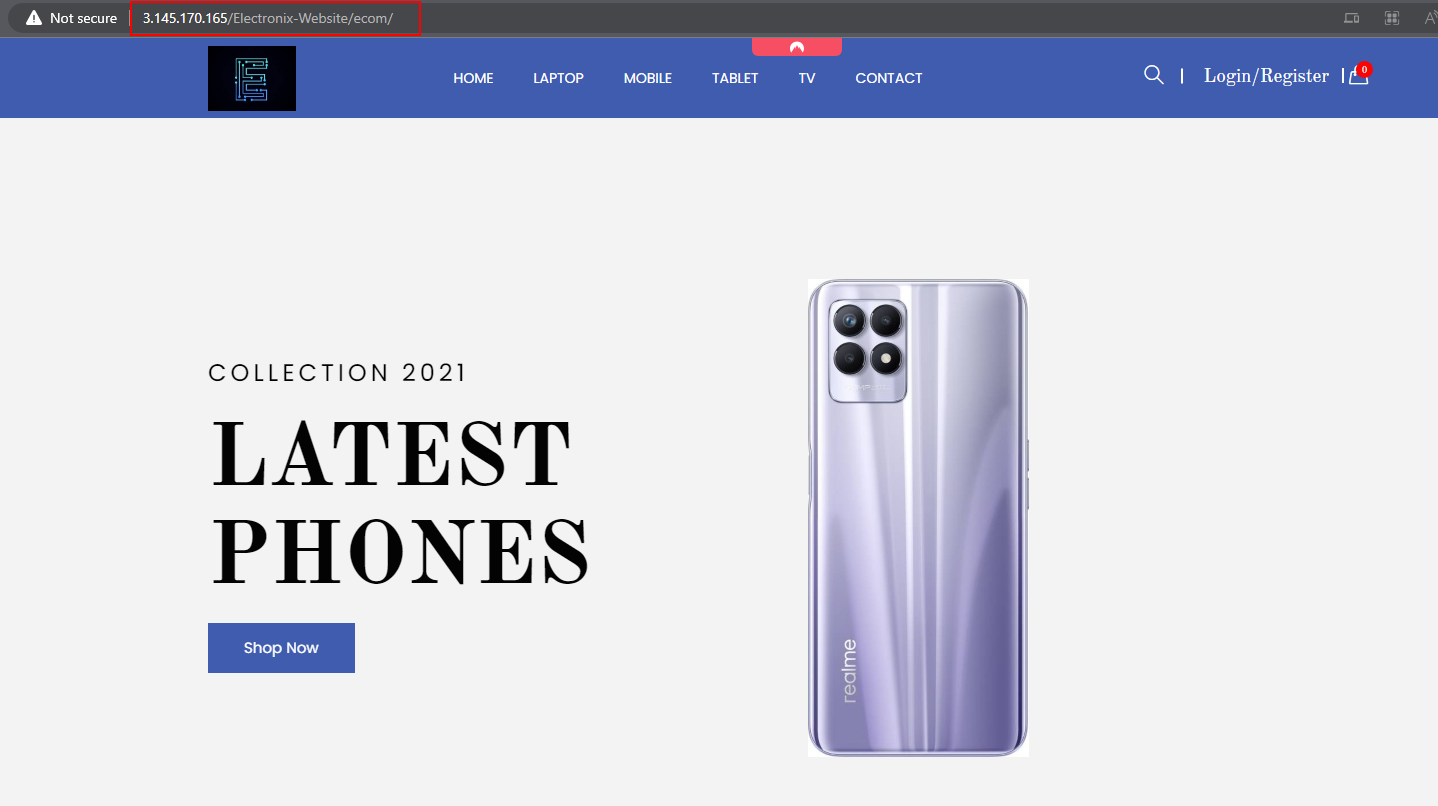
Go to the Url:
3.145.170.165/Electronix-Website/ecom/
Note: go into the Apache config to point the server to the index file.
Conclusion
You’ve successfully deployed a scalable ecommerce application on AWS using VPC, EC2, RDS, and a LAMP stack. This architecture is highly scalable and can be further enhanced with load balancers, caching layers, and auto-scaling groups for production readiness.